Learning how to install car mods on PC takes about 20 minutes for your first car and five for every car after that. The whole job is copying a few files into a folder you create yourself, registering them in one small list, and testing the result in single-player mode.
This guide covers Grand Theft Auto V on PC, because that is where almost every “car mod on PC” search lands. If you came looking for Assetto Corsa, BeamNG.drive or a FiveM server, jump to the section on other games further down, where the process is much simpler.
Updated for 2026. Everything here applies to the PC release of GTA V in single-player, on both the Legacy and Enhanced editions.
- Back up the GTA V folders you are about to touch before changing anything.
- Check that the mod’s author supports your exact game edition and game version.
- Install OpenIV from the official site and run it as administrator.
- Point OpenIV at your GTA V folder, usually C:Program Files (x86)SteamsteamappscommonGrand Theft Auto V.
- Create a mods folder by copying the game’s update folder into it.
- Drop the car’s .rpf pack into modsupdatex64dlcpacks.
- Add the pack’s file path as a new line in dlclist.xml.
- Launch Story Mode, spawn the car by its model name, and drive it.
The step above that beginners skip is the first one, and it is the step that saves everybody else. Mods break files, and a backup is the difference between a five-minute fix and a fresh download of a 70 GB game.
Table of Contents
- What You Need
- Step-by-Step: How to Install Car Mods on PC for Beginners
- Frequently Asked Questions
- Can I install car mods on the normal version of GTA 5?
- Should I back up my GTA game before installing a car mod?
- What is the difference between a replace and an add-on car mod?
- Do I need OpenIV to install car mods on PC?
- Why does my car mod crash the game or appear without wheels?
- How do I remove a car mod and restore the original vehicle?
- Conclusion
What You Need
You need four things, and two of them are free to download from the official sites. Everything else is already on your PC.
- The right game edition. GTA V ships as Legacy and Enhanced. A mod built for one does not load on the other, and mods made before the Enhanced release generally do not work on it.
- A mod source you can verify. Well-maintained sites list the game version, the file name and the model name in the download page. If a page has none of those, skip it.
- OpenIV, the file browser used for the GTA V series. Download it from openiv.com only, then right-click the executable and choose Run as administrator.
- A clean backup of the dlc.rpf, update.rpf and x64 folders in your GTA V directory.
- Optional but useful: Notepad++ for editing XML lists, and a trainer such as Simple Trainer or Menyoo to spawn a car by name.
Replace files and add-on files are not the same thing
A replace mod overwrites the files of a car that already ships with the game. You will receive one or two loose files, usually named after the car it replaces, and you drop them into a specific archive inside the game.
An add-on mod adds a car that is not in the game. It arrives as a small dlcpack, which is its own self-contained folder with a data folder, a content.xml file and several .meta files inside it. Add-on packs are what most beginners want, because a broken add-on affects nothing else in the game.
File extensions worth recognising: .yft is the 3D model, .ytd is the texture, .ybn holds the physics, and the .meta files inside an add-on pack tell the game the car’s name, handling, colours and shop availability. If a download contains a folder called dlc.rpf, it is an add-on pack.
Before anything else, check one more thing: the mod’s supported game version. Mods list a game build number, and if yours is older than the mod’s minimum you get crashes rather than cars. A backup makes version mistakes survivable.
Step-by-Step: How to Install Car Mods on PC for Beginners
The workflow below assumes an add-on car for GTA V on Windows, because that is the most common case. Each step says what you do and how you can tell it worked.
- Back up. Copy the dlc.rpf, update.rpf and x64 folders out of your GTA V directory into a separate folder on your desktop. You now have a way back.
- Open OpenIV in administrator mode and set the top-right dropdown to Grand Theft Auto V. If your game is not detected, set the dropdown to Windows and use the game folder path given below.
- Find the update folder and copy it. Inside the GTA V directory, you have an update folder. Select it, copy it, and paste it into the same GTA V directory. The copy is now called update (copy).
- Rename update (copy) to mods. Right-click the copied folder, choose Rename, and type mods. You now have GTAVmodsupdate, which is a safe place that touches no original game file.
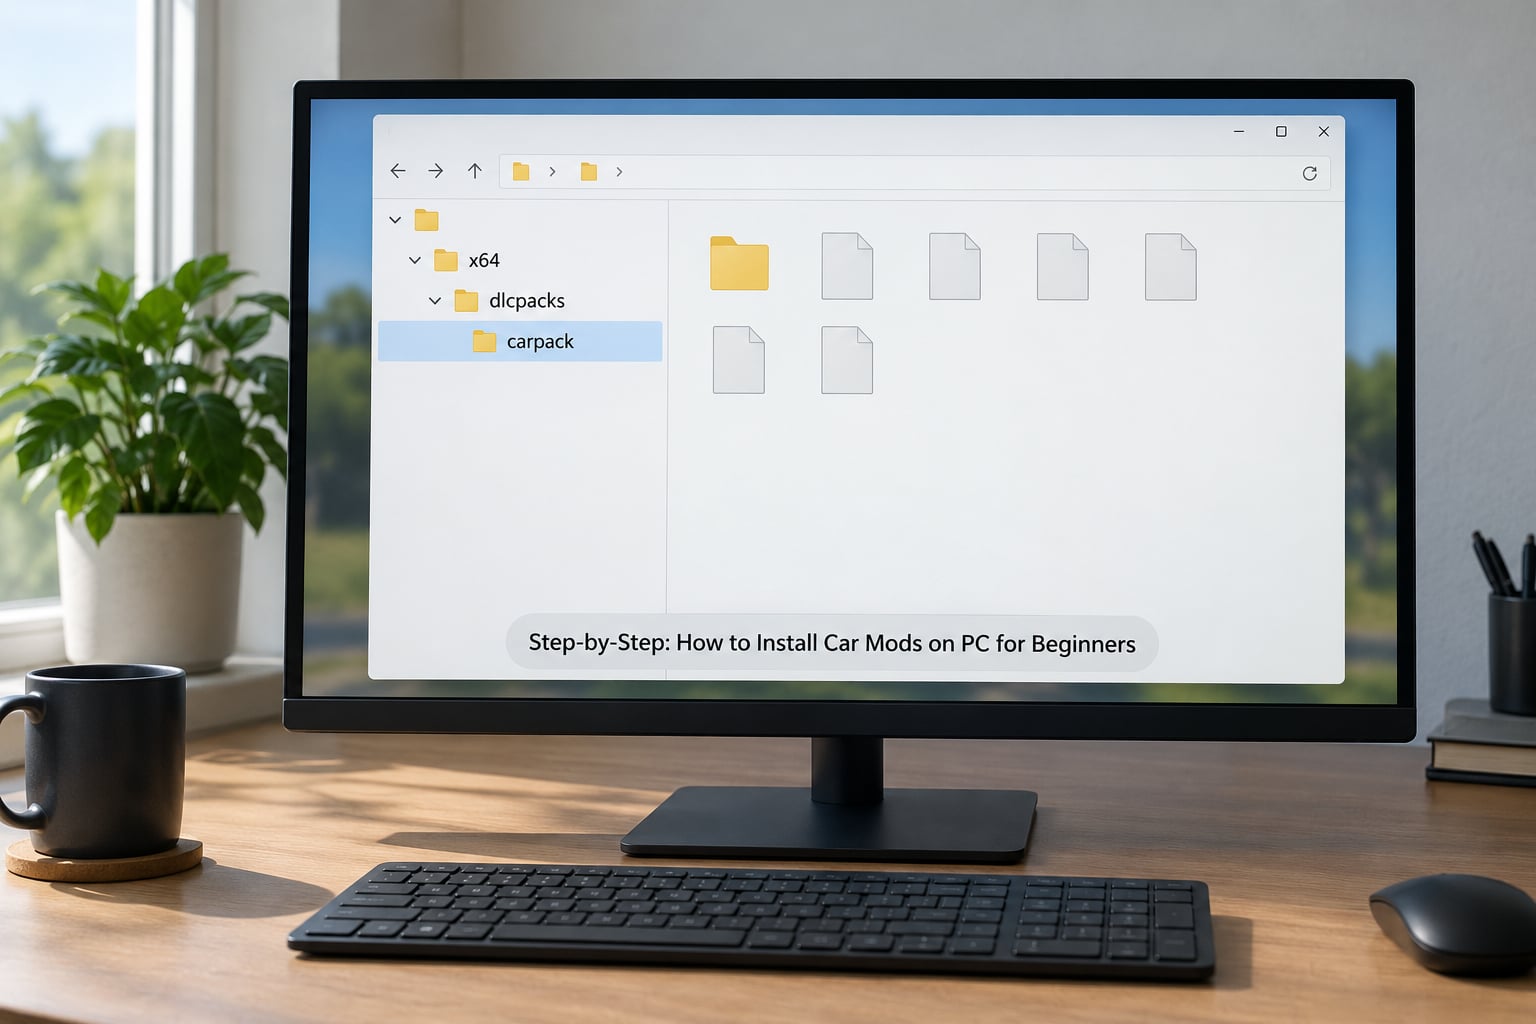
- Create the drop folder. Go to modsupdatex64 and create a new folder called dlcpacks. The path you need is modsupdatex64dlcpacks.
- Drop the pack in. Extract the mod download and copy the whole car pack folder into dlcpacks, so the pack’s own folder sits directly inside it.
- Register the pack. Open modsupdateupdate.rpfdlclist.xml, add one new line before the closing tag, and save. The line reads dlcpacks:/patchday3ng/dlc.rpf, with your own folder name in place of the example.
- Turn on mods folder mode. Back in OpenIV, open Settings and enable Only Allow Edit in Mods Folder. Then open Edit mode from the Tools menu, confirm the warning, and navigate back to the file you need. Without this, OpenIV refuses to save your changes.
That is the core loop for every add-on car after the first one: drop the folder, add one line, test.
How to Install Car Mods on PC in OpenIV
OpenIV is the tool that lets you write into the game’s packed archives, and it only touches files inside the mods folder you just created. The first time you use it, it asks which folders it may edit, and you tick only the Grand Theft Auto V line.
Finding the game folder differs depending on where you installed it:
- Steam: C:Program Files (x86)SteamsteamappscommonGrand Theft Auto V
- Epic Games: C:Program FilesEpic GamesGTA V
- Rockstar Game Pass or the standalone launcher: C:Program FilesRockstar GamesGrand Theft Auto V
If you moved the game to another drive, the path ends in the same folder name, just on that drive. The quickest way to confirm is to right-click GTA5.exe in the game folder and check Properties, where the location field shows the full path.
To place a file through OpenIV, switch to Edit mode first, then browse to modsupdatex64dlcpacks, click the up arrow to go up one level, and use the upload or paste command to place the pack folder there. You can tell it worked when the pack’s folder appears listed inside dlcpacks with the .rpf file inside it.
To register the pack, go to modsupdateupdate.rpf and open dlclist.xml. Every line in that file points to a pack the game should load at startup, and yours is missing until you add it. OpenIV can open the XML in a text window, but Notepad++ is easier if you expect to do this more than once.
If OpenIV reports it cannot find GTA5.exe, that is the single most common beginner blocker. Run it as administrator, switch the top-right dropdown from Grand Theft Auto V to Windows and browse to the folder manually, and check that the folder is not inside a OneDrive-synced or encrypted container, which OpenIV cannot read. Controlled Folder Access in Windows Security and some antivirus tools also block it; allowing the folder fixes it.
On the Enhanced edition, OpenIV needs a current version, and modders on Reddit report that an updated OpenIV build is required before the game is listed at all. If your dropdown shows no GTA V entry and you know the game is installed, update OpenIV first and try again.
How to Test the Car Mod and Check Compatibility
Close OpenIV, launch GTA V and load into Story Mode. Single-player only: mods are not supported in GTA Online, and combining the two is the fastest way to lose access to your account.
Most add-on cars need a spawner, because the game has no menu entry for a car it has never heard of. With Simple Trainer for V installed, open the trainer, go to the vehicle list, and search the model name from the mod’s readme, usually something like sultanrs or jg1234. Spawn it on a quiet street and walk around it before you drive.
Check these five things in that order:
- Wheels and body. A car with no wheels, or one collapsed into the road, means the physics file is from a different build. Remove it.
- Lights. Headlights, brake lights and indicators working means the pack’s content.xml loaded.
- Engine sound. Silence usually means the handling data is missing an audio name, which is a mod-author problem, not yours.
- Damage model. Open the driver door and the boot. A car that spawns intact but breaks apart oddly usually has a mismatched damage file.
- Frame rate. Drive it for a minute. A heavy car can cost frames, and a very bad sign is a car that stutters whenever you look at it.
If the game crashes on launch, the pack is almost always the newest thing you installed. Undo step 7 by removing your line from dlclist.xml and the pack folder from dlcpacks, then launch again to confirm the game is fine. That two-minute test tells you whether to look at the mod or at something else.
One more thing worth checking before you fall in love with the car: visit Los Santos Customs and see whether the paint and wheel options appear. They only do when the pack’s carcols.meta is present and no other add-on in your dlcpacks folder uses the same model name. Duplicate names are a well-known cause of an add-on that loads but breaks upgrades for every other car.
Install Car Mods for Different GTA Games Safely
The method above is GTA V specific. The older games in the series use a different file layout, and mixing instructions between versions is the fastest route to a broken install.
- GTA V, Legacy and Enhanced: add-on packs go into GTAVmodsupdatex64dlcpacks and are listed in dlclist.xml. Enhanced needs a current OpenIV, and most pre-Enhanced packs do not load on it.
- GTA IV: files go into the game’s dlcpacks folder, and the vehicles themselves live in the dlc.rpfdlcpacksdlc.rpfvehicles.rpf archive. GTA IV has no mods folder protection, so always work from a copy of the whole dlc.rpf.
- GTA III, Vice City and San Andreas: these are old enough that the archives are simple, and vehicle files are dropped into the gta3vehicles folder in the game directory. No OpenIV needed, and no add-on registration.
- Assetto Corsa: drag the car folder into steamappscommonassettocorsacontentcars. That is the whole install, and no modding tool is involved. Custom liveries go in contentcarscarers2 instead.
- BeamNG.drive: drop the vehicle folder into your BeamNG installation folder, then copy any .jbeam data files into the DocumentsBeamNG.drivevehicles folder so the game can read the parameters.
- Winter Car: the folder is the same idea as Assetto Corsa, a cars folder inside the game content directory, and the car appears in the garage on the next launch.
FiveM server admins use a fourth method entirely. There the car files go into a resources folder, the pack needs an fxmanifest.lua at its root and a stream folder holding the .yft and .ytd files, and the resource name gets an ensure line in server.cfg or a txAdmin menu entry. None of that applies to your own single-player copy, and installing FiveM files into GTA V is the fastest way to break the game.
A note on the rest of the search results: “car mods” also means real ones, the radio-controlled and hobby cars people build in a garage. If that is what you were after, the GTA paths above will not help you at all.
Common Mistakes and Easy Fixes
Almost every beginner problem is one of six things, and each has a fix you can do without reinstalling the game.
1. Installed into the base game instead of the mods folder. If you copied files into GTAVdlcpacks or any original archive, your game is now modified in place. Restore those folders from your backup and redo the install under GTAVmods. The advice repeated in r/GrandTheftAutoV_PC is consistent on this point: the mods folder always, with Only Allow Edit in Mods Folder switched on.
2. Forgot Edit mode. OpenIV will not save into the game without it. Tools, then Edit mode, then accept the warning, then reload the file you were editing.
3. Wrong game directory. You created the mods folder in one copy of GTA V and are launching another, which happens when Steam and Rockstar versions are both installed. Check the path in GTA5.exe properties against the path you used in OpenIV.
4. Missing dlclist.xml entry. The files are in the right place and the car still does not exist in game. Open modsupdateupdate.rpfdlclist.xml, check the line sits before the closing tag, and check the folder name in the path matches the pack folder exactly, including capitals.
5. Missing dependencies. Some cars ship with a separate livery pack or a required mod that is named in the readme. Without it the car spawns invisible or crashes on first load.
6. No backup before replacing a vanilla car. Replace mods are the reason backups matter. If a replace file broke a stock car, put the original file back from your backup copy rather than downloading the game again.

Two safety notes and you are ready. First, do not use mods in GTA Online, where they are not supported and can end in a permanent ban. Second, download from the source the mod author names, because archive files carrying installers and unsigned .exe tools are a common malware route, and if your antivirus flags one, check whether you recognise the tool and its publisher before adding an exclusion.
Frequently Asked Questions
Can I install car mods on the normal version of GTA 5?
Yes, the standard PC release of GTA V supports mods in single-player Story Mode, and it is the version this guide is written for. Do not use mods in GTA Online, which does not support them and can lead to a permanent ban. If you own the Enhanced edition rather than the Legacy release, you need a current version of OpenIV, and packs made before the Enhanced release often will not load.
Should I back up my GTA game before installing a car mod?
Yes, and this is the step most beginners skip. Copy the dlc.rpf, update.rpf and x64 folders from your GTA V directory to a separate folder before you touch anything. Add-on installs are then fully reversible, because you delete the pack folder and its dlclist.xml line. Replace mods over stock car files, so without a backup a bad file means a large re-download.
What is the difference between a replace and an add-on car mod?
A replace mod overwrites the files of a car that already exists in the game. You get one or two loose files that you drop into a specific archive, and a bad install damages a stock car until you restore the original. An add-on mod brings a car the game has never had, packaged as its own dlcpack folder with meta files, so it cannot break existing cars and can be removed by deleting one folder.
Do I need OpenIV to install car mods on PC?
For GTA V, yes, in practice. OpenIV is the only reliable way to write into the game’s packed archives and edit dlclist.xml, and it also enforces the mods folder rule that keeps your install safe. Other PC games do not need it: Assetto Corsa is a drag into the content cars folder, BeamNG.drive takes a vehicle folder plus jbeam files, and the older GTA games take files dropped straight in.
Why does my car mod crash the game or appear without wheels?
A car that spawns without wheels, or one that crashes the game, almost always came from a different game build than the one you are running. The model and physics files disagree, and the game gives up. Remove the pack, check the minimum game version listed on the mod’s download page, and update your game to at least that version. A missing separate dependency pack is the second most common cause.
How do I remove a car mod and restore the original vehicle?
Open OpenIV in Edit mode, go to modsu005cupdateu005cx64u005cdlcpacks, and delete the pack folder you added. Then open modsu005cupdateu005cupdate.rpfu005cdlclist.xml and remove the line that points to it, save, and launch the game. A stale dlclist.xml line pointing at a missing folder is itself a crash cause. If you used a replace mod instead, copy the original file back from your backup.
Conclusion
If you do one thing before adding a car, check that the mod supports your exact game edition and version, then copy the dlc.rpf, update.rpf and x64 folders somewhere safe. Install through OpenIV in Edit mode into the mods folder, add the single dlclist.xml line, and test in Story Mode with a spawner. Once the first car works, every car after it is a folder copy and one line of text.