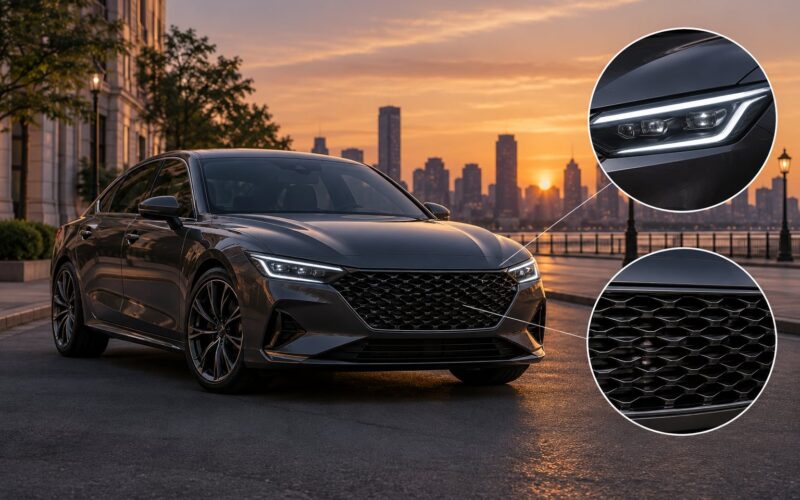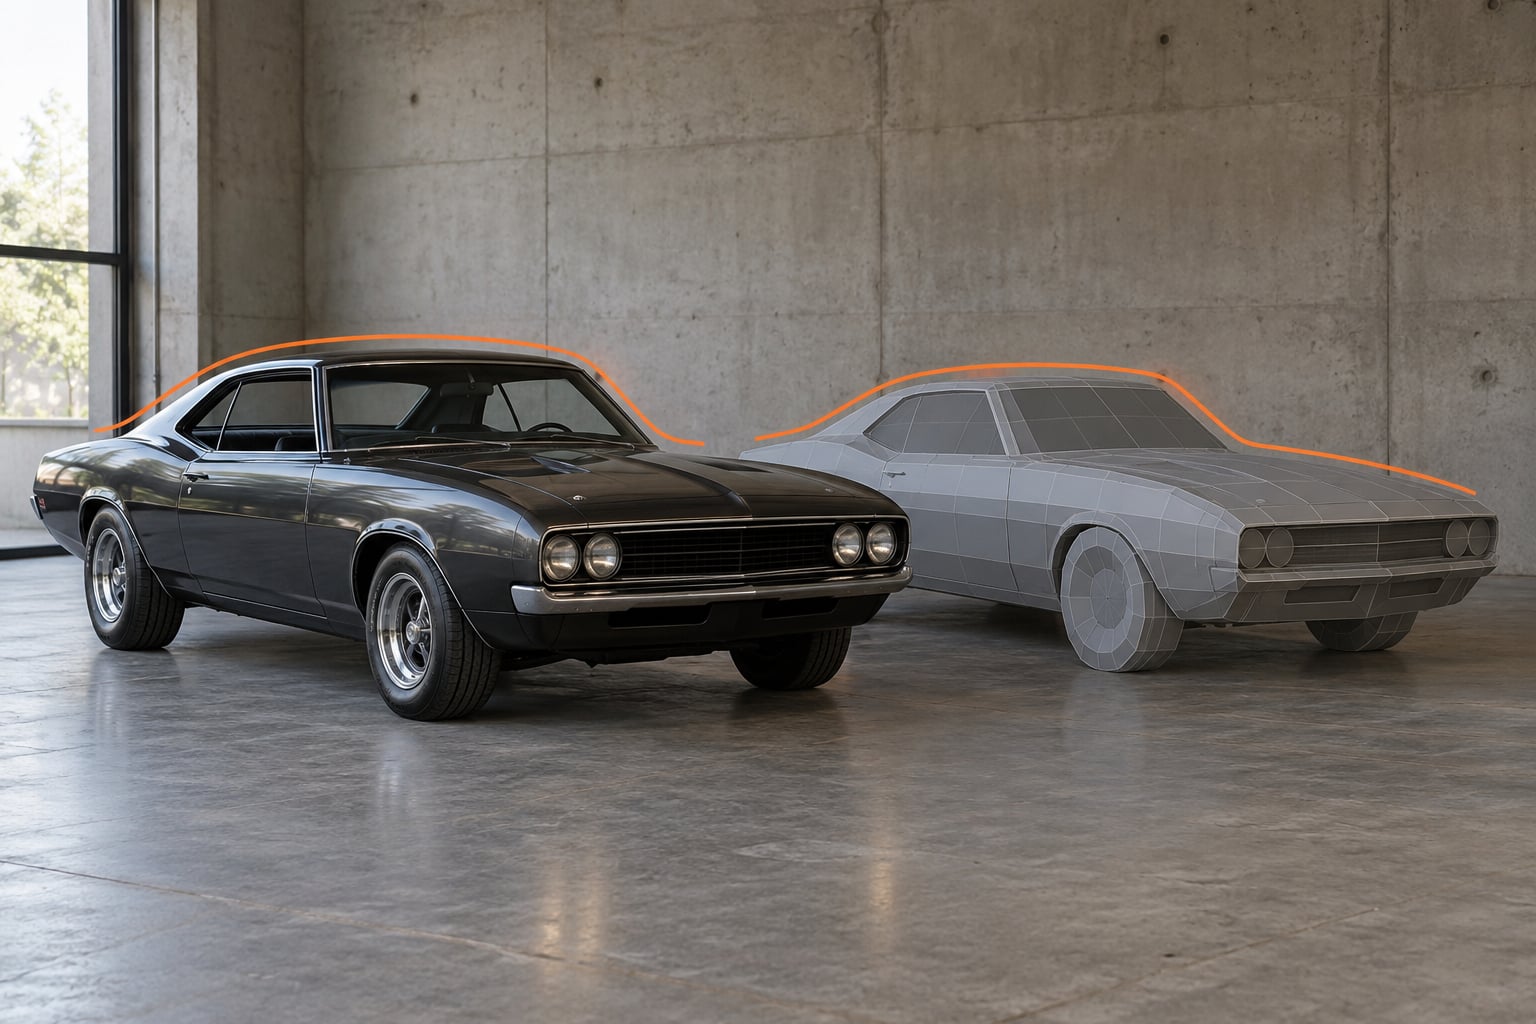
How muscle car styling is recreated in game models comes down to three layers: the period proportions of the car, the surface language built on top of those proportions, and the materials and lighting that make the surfaces behave. Artists lock the shape in a low-poly blockout first, refine the creases and panels, split out wheels and lights, then unwrap and texture the shell for PBR rendering inside a game engine.
Players read muscle cars by silhouette and stance long before any texture detail lands, so the proportion decisions at the blockout stage decide whether a recreation looks like a specific car or just like a generic American coupe with a body kit. That is also where most modded cars in games fall apart.
Table of Contents
- 1What Does Muscle Car Styling Mean in Game Models?
- 2The cues that carry a muscle car silhouette
- 3How Do Artists Translate Real Cars Into Game Geometry?
- 4Gathering reference that holds up under scrutiny
- 5How muscle car styling is recreated in game models, step by step
- 6Which modeling software suits the build
- 7How Are Muscle Car Curves and Body Details Recreated?
- 8Hood and fender surfaces
- 9Wheel arches, stance and panel gaps
- 10The details that sell the era
- 11How Do Materials Make the Styling Look Believable?
- 12How Do Lighting and Game Cameras Showcase the Design?
- 13How Do You Check and Optimize a Muscle Car Model?
- 14What mod communities notice first
- 15Triangle budgets and LOD tiers by vehicle class
- 16UV, collision and hand-off checks
- 17Licensing and trademark limits
- 18Frequently Asked Questions
- 19What makes a muscle car model look realistic in a PC game?
- 20Should muscle car models use more polygons than other vehicle models?
- 21How important are reference images when modeling a muscle car?
- 22What details make a muscle car recognizable in-game?
- 23Can I make a muscle car model from a low-poly vehicle?
- 24How do I optimize a detailed muscle car mod without losing its styling?
What Does Muscle Car Styling Mean in Game Models?
Muscle car styling is a design vocabulary, not a single shape. It runs from late-1940s hot rods through the 1960s first-generation cars to the E-body and second-generation models, and each era carries its own set of cues. In a game model, those cues have to survive at gameplay distance, which means every one of them gets modeled rather than implied.
The cues that carry a muscle car silhouette
- Long hood, short deck. The engine sits far forward of the front axle line and the rear overhang is short. The cabin sits back, which stretches the hood visually.
- Coke-bottle flanks. The side profile pinches in at the door and swells out over the rear wheels. On an E-body Challenger or Charger the curve is a full arc; on an early Mustang it is a gentler swell across the rear quarter.
- Hooded or hidden headlamps. Headlights pushed behind a grille, a clamshell nose, or an angled bezel that reads as a slit from the front. A flat rectangle of glass gives the game car away instantly.
- Sculpted quarter panels. Heavy rear haunches over the drive wheels, usually with a crease running from the front fender into the rear arch.
- Tail-light graphic. The 1969-70 Charger and the 1969 Camaro both built identity around a full-width rear light panel. Reproducing it as a texture alone never works; it needs recessed geometry.
- Side-exit exhaust. Header pipes exiting through the front fender and lower valance, a signature cue on several big-block cars.
- Short overhangs and a wide stance. Bumper to wheel is short front and rear, the track sits wide, and the body sits low. Ride height is the single cheapest cue to get right or wrong.
- Period wheels and rubber. Narrow steel wheels or five-spoke cast wheels, whitewalls, and tall sidewalls. Modern low-profile tire fitment removes the stance cue that says “1968”.
What separates muscle car styling from generic sports-car design is proportion and mass. A sports car in a game gets short overhangs and a low roof because that reads as speed. A muscle car gets the same short overhangs but a longer, flatter hood and a squared-off roof, because it reads as power and straight-line intent.
How Do Artists Translate Real Cars Into Game Geometry?
The translation starts with reference, not with a cube. Two images of the same car from different angles will give you two different cars, so the first job is building a reference set that agrees with itself.
Gathering reference that holds up under scrutiny
Build one sheet with an orthographic side view, a front view and a rear view at the same scale, plus three-quarter views from both front corners. Orthographic side views are the important one; a perspective photo distorts length and will quietly pull your hood short. Period photographs from the era are better than modern photographs because wheel fitment, ride height and trim all changed.
Then mark four measurements on that sheet before modeling anything: wheelbase, front overhang, rear overhang, and track width. Add ride height as a fifth. Those five numbers control most of the read. Everything else on the body can be approximated for a while without the car feeling wrong.
How muscle car styling is recreated in game models, step by step
Build the blockout at final scale. A Mustang is roughly 4.6 metres long, a full-size muscle car 5 metres or more; a blockout modeled at the wrong scale will look wrong later even when the proportions are right.
Start with the wheel wells and the cabin volume as primitives, then bridge them with the hood, deck and rocker panel. Keep the roof flat and the glass opening simple at this stage. Once the side silhouette matches the blueprint, mirror the half-shell so the car is symmetric, then start the real work.
Separate the shell into the parts an engine will need: body, doors or door lines, hood, bumpers, grille, each light, mirrors, wipers, exhaust tips, and the four wheels with their tires and brakes. A body joined into one mesh cannot have a hood that opens or a wheel that spins, and it cannot take different liveries per panel without a messy material setup.
Which modeling software suits the build
| Software | Strength for a muscle car build | Watch out for |
|---|---|---|
| Blender | Free, full hard-surface toolkit, mirror modifier, UV unwrap, PBR shader editor, FBX and glTF export | Bevel and weighted normal settings need deliberate setup or game surfaces come out lumpy |
| 3ds Max | The industry standard in many automotive and AAA pipelines, strong modifiers stack | Licensing and a steeper learning curve |
| Maya | Clean topology tools and a familiar rigging workflow, common in studio pipelines | Heavier than Blender for a solo build |
| ZBrush | Sculpting a coke-bottle flank or a sculpted hood bulge directly from reference | Retopology and game-ready export are a separate pass |
| Substance Painter | Authoring the paint, chrome, rubber and dirt maps as a single PBR set | Material knowledge matters as much as the tool |
The most-asked question from beginners building a car for GTA V is which package to open first, and the honest answer is Blender. It costs nothing, it has every step of the pipeline, and the export path to game engines is built in.
How Are Muscle Car Curves and Body Details Recreated?
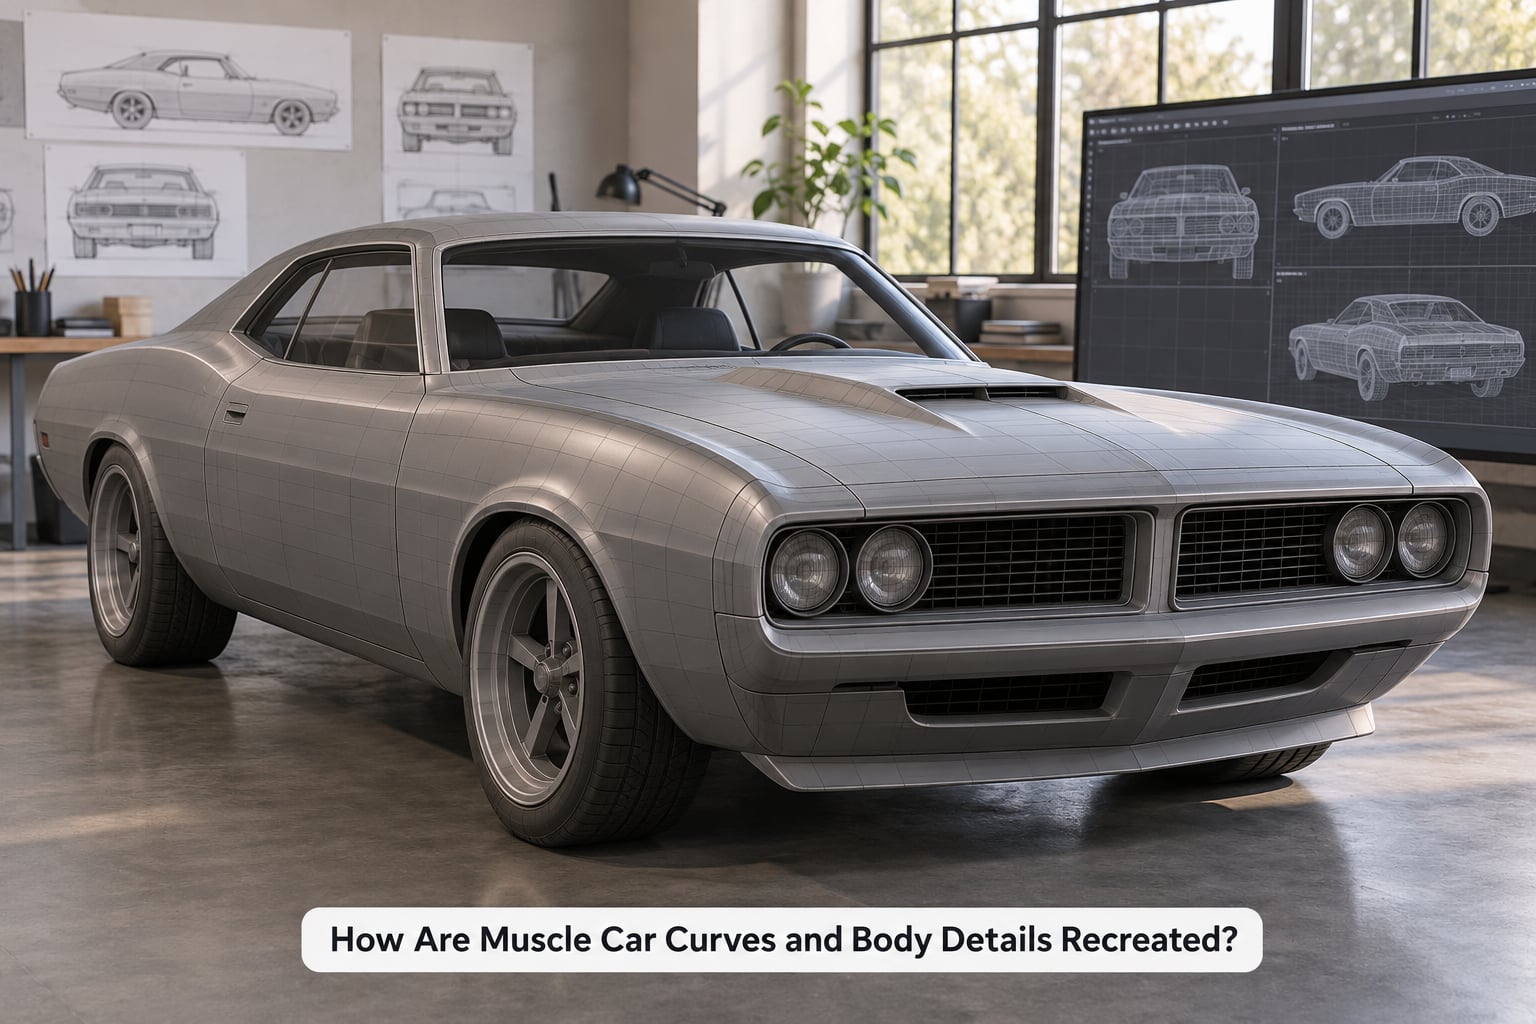
A coke-bottle flank is built with a handful of well-placed loops that travel from the front fender, through the door, into the rear arch bulge. Artists usually run a control loop along the beltline, another along the rocker, and a third along the top of the rear haunch, then move those loops in and out to shape the arc. Getting the beltline to kick up slightly over the rear wheel is what stops the side from looking slab-sided.
Hood and fender surfaces
Most muscle car hoods are not flat. They carry a power bulge, twin nostrils, or a scoop, and they often sit proud of the fender tops with a shut line running down each side. Model the hood as its own object, keep the shut line as a thin bevel rather than a texture stripe, and let the fender tops sit a touch lower so the hood reads as a separate plane of metal.
A functional hood scoop or a forward-facing shaker needs its own geometry and its own shadow. A scoop rendered as a black rectangle on the texture looks like a sticker at any distance a player will actually see the car from.
Wheel arches, stance and panel gaps
The wheel arch is where stance is decided. Cut the arch slightly above the tire’s true opening, keep the fender lip a tight radius instead of a soft bevel, and lower the whole body until the arch gap reads as a deliberate period gap rather than a wheel stuffed into a hole. Players read stance in the first second of looking, before geometry detail has a chance to register.
Panel gaps matter for the same reason. On a real car the doors sit fractionally proud or flush depending on the era, and the light lenses sit deeper than the surrounding metal. Give each light and bumper a small recess and the car immediately gains physicality.
The details that sell the era
Chrome bumpers, grille mesh, hood pins, side mirror shape, antenna, exhaust tip diameter, wiper count, steering wheel style inside the glass. Most of these are small, and most of them are separate objects in a game-ready asset so they can be swapped.
How Do Materials Make the Styling Look Believable?
Geometry gets the shape right, materials decide whether it reads as painted metal. A muscle car is a lot of gloss with a lot of hard specular on it, and that combination is exactly what a generic rough shader destroys.
Set up proper PBR channels for every surface. Body paint needs a low roughness base with a clear coat layer, and it needs small variations in roughness across panels, because a perfectly uniform gloss makes a car look like plastic. Chrome needs a clean mirror reflection with a slightly rough variant for bumpers, which are rarely perfect on a period car. Rubber tires need high roughness and a dark albedo with tread modeled as a normal map, because sidewall lettering and tread blocks read as scale cues at a distance.
Glass is the quiet one. A single flat transparent pane with no reflection looks like a hole. Use a dark tinted glass material with some reflectivity, and keep the interior simple but present, since an empty cabin with visible glass kills the illusion from the side.
Wear sells the rest. A dirt map in the wheel wells, light grime along the rocker panels, and subtle swirl marks in the clear coat do more for believability than any extra geometry. Add a second livery layer for stripes and graphics, since a Trans Am’s stripes or a Shelby’s stripes are part of the design language rather than decoration, and a game asset that cannot swap them will be criticized for it.
How Do Lighting and Game Cameras Showcase the Design?
The same model can look right in one scene and generic in another, and the difference is usually the lighting. Flat midday sun kills the surface language: a coke-bottle flank needs a gradient running along its length to be visible, and hard overhead light flattens that gradient to nothing.
Low, raking light from the front three-quarter is the classic choice. It catches the fender crown, the hood bulge and the shoulder line over the rear haunch at the same time, which is where the muscle car read lives. A rim or edge light behind the car separates the roofline and rear quarter from a dark background, and that separation is what makes the silhouette hold up against a night scene.
Camera height changes the proportions the player sees. A camera at bumper height exaggerates the long hood and hides the roof; a camera above the beltline shortens the car and shows more glass than the design intended. For a showcase shot of a muscle car, keep the camera near headlight height and use a longer focal length, because a wide lens adds perspective distortion that makes the nose look larger and the deck shorter than it is.
Environment matters as much as lighting. A reflective showroom floor doubles the apparent stance, a garage with warm practical lights sells the private-collection feel, and a night road scene hides detail but makes the light signature and the stance carry the whole read.
How Do You Check and Optimize a Muscle Car Model?
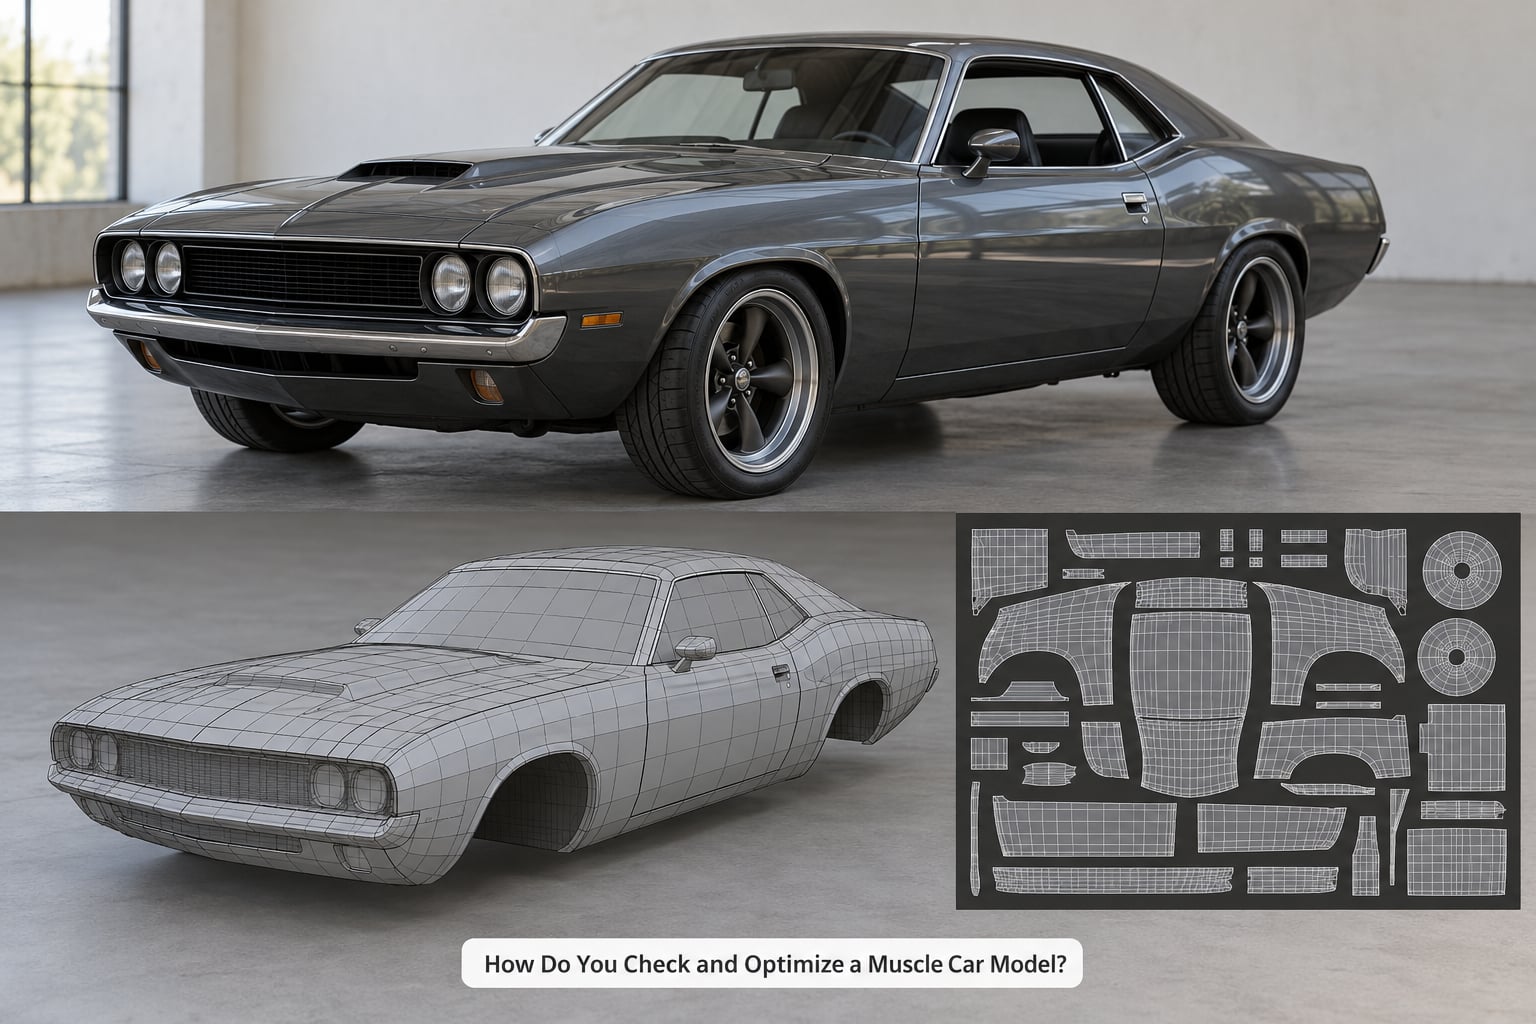
The check that catches the most mistakes is free. Flip to a flat side view with no textures, no materials and no lighting, then overlay the reference blueprint at the same scale. If the hood, roof break, deck height and wheel arches do not line up, nothing you do later will fix it.
What mod communities notice first
Players spot bad recreations within seconds, and the tells are consistent. Extreme anti-aliasing on a modded car against a non-anti-aliased world is the loudest one. Tires that are over-detailed for their draw distance, or strangely flat and low-poly while the body is sharp, come next. Then ride height: a car sitting noticeably higher or lower than the traffic around it. After that, panel alignment, since doors that do not line up or a hood with a gap that changes width read as broken rather than old.
In the customization crowd there is also a style argument worth knowing before you build. Forum consensus tends to favor stock-adjacent builds with restrained, period-correct colors over heavily modified ones, and the same is broadly true of the asset side. A faithful recreation scores better than an exaggerated build, partly because the exaggerated build usually means the period cues were skipped.
Triangle budgets and LOD tiers by vehicle class
| Vehicle class | Body triangles at LOD0 | Typical LOD chain | Texture resolution |
|---|---|---|---|
| Retro low-poly | 1,000 – 3,000 | Single level, vertex-snapped look kept deliberately | 128 – 512 px, hand-painted or pixel-art style |
| Street car | 10,000 – 20,000 | 3 levels, roughly 100% / 40% / 15% | 2K |
| Muscle or hero car | 30,000 – 60,000 | 3-4 levels plus a separate interior shell | 2K per material, 4K for the hero paint |
| Multiplayer / FiveM server | 20,000 – 40,000 | 4 levels, distance-based streaming | 2K, streamed by texture group |
| Unreal or Unity indie project | 40,000 – 80,000 | 5 levels with a simple collision mesh | 4K, packed into a shared atlas |
Those numbers are per body, and they assume the wheels, glass and interior are separate objects. Draw calls matter more than triangles for a garage: a player running sixty recreations has sixty times your material count, so reuse a shared master material per body panel group and let paint colors vary through parameters instead of unique textures.
UV, collision and hand-off checks
Curved quarter panels are where unwrapping goes wrong. Keep the seam on an underside edge or a panel gap, where a stretched pixel will never be seen. Check the bake with a checker texture, and look specifically at the coke-bottle flank, the hood crown and the roof, where stretching is worst and most visible.
Build a simple collision box set before export rather than letting the engine run physics against the visual mesh. Confirm the wheel parenting, the naming convention, the scale at import and the material count, and export as FBX or glTF with UVs and normals intact.
Licensing and trademark limits
Recreating a real, trademarked muscle car for personal, non-commercial modding is a very different situation from shipping it. Badges, grille emblems, model names, factory paint codes and wheel designs can all be protected, and some manufacturers enforce more actively than others. Keep the asset off public storefronts, avoid distributing raw source files, and read the license on any base mesh you start from. Many asset creators permit commercial use of the finished asset but forbid redistribution of the raw files, which is the standard to follow.
Frequently Asked Questions
What makes a muscle car model look realistic in a PC game?
Proportion first: correct wheelbase, overhangs, track width and ride height, checked against an orthographic side view with no textures on. Then stance and the coke-bottle flank, since players read those before surface detail. After that it is painted-metal shading rather than pure gloss, crisp panel gaps, recessed lights, and tires with believable sidewall and tread. Lighting and camera height decide how much of that work the player actually sees.
Should muscle car models use more polygons than other vehicle models?
Not for its own sake. A muscle car needs enough density on the flanks, hood crown and wheel arches where the curves carry the design, but the roof, underside and door interiors do not need any. Most finished muscle car game assets land between 30,000 and 60,000 triangles for the body. Spending that budget on one smooth coke-bottle arc beats spending it on door card detail nobody sees from the driver’s seat.
How important are reference images when modeling a muscle car?
They are the whole job, because period design is specific and memory is not. Build one sheet with an orthographic side view, a front view and a rear view at matching scale, then mark wheelbase, front and rear overhang, track width and ride height on it. Use period photographs where you can, since fitment and ride height changed. Working from a single three-quarter photo instead will quietly distort the hood length.
What details make a muscle car recognizable in-game?
The silhouette cues come first: long hood over a short deck, short overhangs, a wide low stance, and a roofline that stays flat and squared rather than swept. Then the era markers, which are a coke-bottle flank, hooded or hidden headlamps, a sculpted rear quarter, a full-width tail-light graphic, side-exit exhaust, and period wheels with tall sidewalls or whitewalls. Get those right and the car reads correctly even at a distance.
Can I make a muscle car model from a low-poly vehicle?
You can use one as a base, but not as a shortcut around the proportions. Stretching a generic low-poly coupe into muscle car proportions produces stretched UVs, uneven panel gaps and a surface that reads as a reskin, which is the standard criticism of cheap custom bodies. A better use of a low-poly base is to copy its topology onto correct reference measurements, then re-unwrap. Low-poly is also a legitimate art direction for retro styled projects, just not as a disguise for wrong proportions.
How do I optimize a detailed muscle car mod without losing its styling?
Cut geometry that no camera angle can reach first, then work down the LOD chain rather than cutting the hero model uniformly. Keep the density where the design reads, which means the fender crowns, the flank curve, the wheel arches and the light signatures, and simplify the roof, underside, engine bay and door cards. Sharing one master material across the garage saves far more than triangles do, and reusing the same wheel mesh on every car cuts draw calls hard.
The order matters more than the tools. Build a correct blockout from orthographic reference, mirror it, cut the stance before you cut any detail, then add surface language and separate parts. Only after that do materials and lighting make the styling land. Start with the side-view silhouette check, because everything downstream depends on it, and 2026 keeps offering cheaper ways to hide a wrong silhouette rather than ways to fix one.