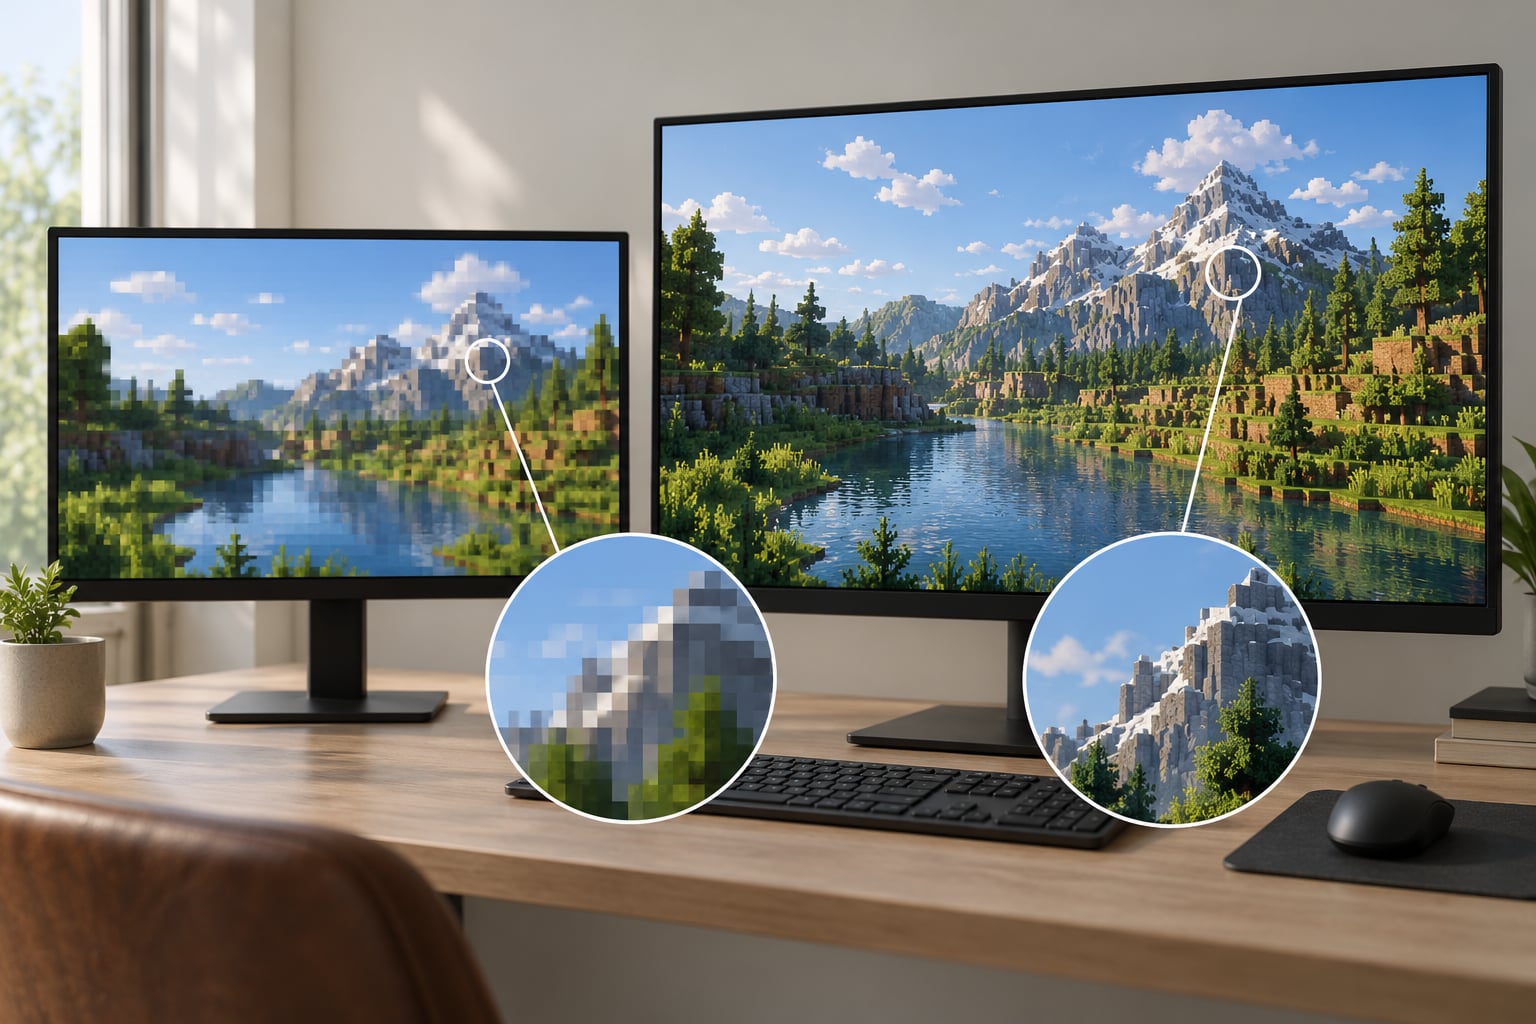
A blurry game screenshot is usually blurry before you touch it. Compression, temporal anti-aliasing and motion blur are baked into the capture, so learning how to upscale game screenshots without blur means starting from the cleanest original you can get, running it through an AI upscaler once, and exporting losslessly. The whole job takes about ten minutes per image and no advanced editing skills.
The order matters. Sharpen first and resize second, and you get halos and ringing around every HUD label. Resize first with an AI model, then sharpen lightly if it still looks soft.
Here is the workflow I use, from checking the source file to the final export.
Table of Contents
- 1What You Need
- 2Step-by-Step: How to Upscale Game Screenshots Without Blur
- 31. Check the source and choose a target size
- 42. Upscale the image with an AI tool
- 53. Inspect and refine the enlarged result
- 64. Export in a suitable image format
- 75. Verify sharpness before publishing
- 8Common Mistakes and Quick Tips
- 9Frequently Asked Questions
- 10What is the best way to upscale game screenshots without blur?
- 11Can basic image resizing make a game screenshot high resolution?
- 12Should I upscale a screenshot to 2x or 4x?
- 13Does AI upscaling invent details in a game screenshot?
- 14What file format is best for an upscaled screenshot?
- 15Conclusion: Start with the Original and Upscale Once
What You Need
You need very little, and none of it is paid-only.
- The original screenshot in the highest resolution the game or system produced. If a photo mode or high-resolution capture option exists in the game, recapture the scene before doing anything else.
- An AI upscaler such as Upscayl, a free desktop app that runs the model on your own machine, or a comparable browser tool if you only have one image to handle.
- An image editor for the sharpening pass. GIMP is free and does the job; Photoshop is the same idea with more sliders.
- A target size decided in advance, usually 2x. 4x is for large displays or heavy cropping.
- Free disk space for the enlarged copy. A 4x upscale of a 4K capture lands around 132 megapixels, which is not a small file.
One limit worth stating plainly: an upscaler reconstructs plausible detail. It cannot recover genuine information that the capture never recorded. Sharper is achievable, but “more detail than the game rendered” is not.
Step-by-Step: How to Upscale Game Screenshots Without Blur
1. Check the source and choose a target size
Open the original at 100% zoom and record its pixel dimensions. In Windows, right-click the file, choose Properties, and read the Details tab; in GIMP, the title bar shows width and height in pixels.
If the source is 1920×1080, a 2x upscale gives you 3840×2160 and a 4x upscale gives you 7680×4320. That is the arithmetic for every scale factor: multiply width and height by the same number so the aspect ratio stays intact. Never change only one dimension, or the image stretches.
Check what you are working with before enlarging. A screenshot that has already been through heavy JPEG compression, or one you cropped and saved several times, will upscale into mushy textures because the model is reconstructing damaged pixels. If the file has been edited heavily, recapture the scene.
Rule of thumb: 2x is enough for social posts, video, and most wallpapers. Reach for 4x when you plan to crop into a detail and blow it up to a large monitor, or when you are printing.
2. Upscale the image with an AI tool
In Upscayl, click Select Image and choose the screenshot, then open the settings panel with the gear icon to pick an output format and destination folder. Choose a scale factor of 2 or 4 from the dropdown, select a model, and press the Upscayl button to process. A current desktop GPU handles a single 2x image in a few seconds; integrated graphics may fall back to CPU and take noticeably longer, or refuse to start at all if a Vulkan backend is missing.
Model choice is where screenshots differ from ordinary photos. Real-ESRGAN x4plus is a safe general choice for most games. Ultrasharp pushes edge contrast harder, which suits architecture and distant buildings. Remacri is a common pick for foliage and fine textures. The anime model is the one to reach for on cel-shaded or anime-style games, and waifu2x-style models still do well on UI elements and clean line art.
Each model has a failure mode. Heavy sharpening turns character silhouettes into bright outlines. Denoising-smoothing makes foliage and rain look like plastic. Reflection-heavy scenes with lots of bright specular highlights often gain invented sparkle. Upgrading to a cleaner original beats changing models.
3. Inspect and refine the enlarged result
Open the original and the upscaled file side by side, both at 100% zoom, and alternate between them. Zooming to 200% on a HUD number or a character’s face is where quality problems show up fastest.
Refinement should be restrained. In Photoshop, use Image > Image Size with Constrain Proportions enabled for any resampling, then Filter > Sharpen > Smart Sharpen, starting around 30 to 40 percent Amount with a Radius near 1 pixel and Reduce Halos checked. In GIMP, the equivalent path is Filters > Enhance > Unsharp Mask, with Amount low and Radius around 1 to 2 pixels.
If you need more than that, you are compensating for a weak source. Another 15 percent of sharpening may rescue one element and wreck the rest of the frame.
4. Export in a suitable image format
Save a master copy as PNG. PNG is lossless, so the image stays exactly as your editor rendered it, and it handles the alpha transparency some photo modes produce. TIFF is the better choice for files you plan to reopen and edit later, or for print work where you want 16-bit depth.
Then export a smaller web copy separately rather than overwriting the master. Keep the master’s color mode; an sRGB PNG is what every platform expects, and converting to CMYK only makes sense when a print shop asks for it.
JPEG is the trap. Quality settings above 90 still smear the fine HUD text, thin grass, and dark night skies that game screenshots are full of. For a web copy, use PNG for flat UI and text, or a high-quality JPEG with chroma subsampling disabled for photographic scenes. Keep a naming convention, such as adding an _x2 or _4x suffix, so the untouched original stays obvious.
5. Verify sharpness before publishing
Look at the final file at 100% and again fit to screen, because most viewers downscale large images and hide defects. Check four things: HUD text is readable, edges around characters and buildings are clean rather than glowing, straight lines like fences and building edges stay straight, and textures such as grass, gravel, or fabric still look like the material rather than painted plastic.
Upload a test copy to the destination platform and view it there. Social platforms re-compress whatever you give them, so the version on your disk and the version in the feed are rarely identical. Judge the feed version, not the file.
Keep the enhanced file separate from the original capture. Folder named something like Screenshots-original and Screenshots-upscaled keeps you from re-editing a file you already processed twice.
Common Mistakes and Quick Tips
Most blurry results come from one of six mistakes, and all six are avoidable.
Using basic resize. Stretching pixels with a resize tool adds no information; it just makes each pixel bigger and the softness more obvious. An AI model predicts plausible texture instead, which is why the same image looks sharp in one tool and smudged in the other.
Upscaling an already upscaled file. Each pass compounds the previous model’s guesses. Always start from the original capture.
Sharpening too hard. Heavy sharpening produces halos and ringing around high-contrast edges, and it is very visible on HUD text. Light pass, checked at 100%, is the whole trick.
Over-compressing the export. A quality-80 JPEG destroys exactly the fine detail you just recovered. Save a lossless master and compress only the copy you upload.
Editing destructively. If your editor saves in place, the next pass starts from a damaged file. Duplicate first, always.
Wrong model for the content. A photo-oriented model smooths anime line art, and an anime model invents noise in a photorealistic forest. Match the model to the art style.
A few habits that save time: keep the original untouched in its own folder, use 4x only when you need the extra pixels, never break the aspect ratio, and test on one representative scene before you batch process a folder of two hundred screenshots.
If a scene fights you at every setting, capture it differently instead. Many games offer a photo mode with depth of field, motion blur, and film grain switched off, and those three settings are responsible for much of the softness in a typical AAA screenshot. Re-rendering with them disabled gives the upscaler a far better starting point than any amount of post-processing.
Frequently Asked Questions
What is the best way to upscale game screenshots without blur?
Keep the original capture untouched, upscale it once with an AI model rather than a basic resize tool, then apply light sharpening and export losslessly. A 2x scale handles most sharing needs. If the screenshot already looks soft, recapture the scene with motion blur and depth of field disabled before upscaling, since an upscaler cannot recover detail the capture never recorded.
Can basic image resizing make a game screenshot high resolution?
No. Basic resizing interpolates the pixels you already have, so each one simply becomes a larger block of the same color. The file gains size but no detail, and the softness becomes easier to see. An AI upscaler is different because it predicts what the missing detail probably looked like, which is why learning how to upscale game screenshots without blur requires a model-based tool.
Should I upscale a screenshot to 2x or 4x?
Use 2x for most work: social posts, videos, and wallpapers on a standard display. Choose 4x when you plan to crop into a detail, print the image, or display it on a very large monitor. Going beyond 4x rarely helps, because the model has less real information to work from and tends to invent texture you then have to sharpen away.
Does AI upscaling invent details in a game screenshot?
It does, to a degree. Models like Real-ESRGAN generate the pixels that fill in gaps rather than recovering a record of what was there, so fine textures can change slightly and faces can shift by a pixel or two. For screenshots this is usually harmless. It matters if you need the image to be a faithful record, for example when documenting a bug or comparing game versions.
What file format is best for an upscaled screenshot?
PNG is the safe default because it is lossless, widely supported, and handles transparency from photo modes. Use TIFF as your working master if you will reopen and edit the file or send it to a print shop. Avoid JPEG for anything with fine HUD text or dark night scenes, since compression smears exactly the detail you spent time recovering.
Conclusion: Start with the Original and Upscale Once
The first action is always the same: preserve the original, open it at 100% zoom, and note its pixel dimensions. From there, run one controlled AI upscale with a model matched to the art style, add sharpening only if the result still looks soft, and export a lossless master.
Use 2x for most sharing. Save 4x for large displays, printing, or heavy cropping, and never upscale a file you have already upscaled.