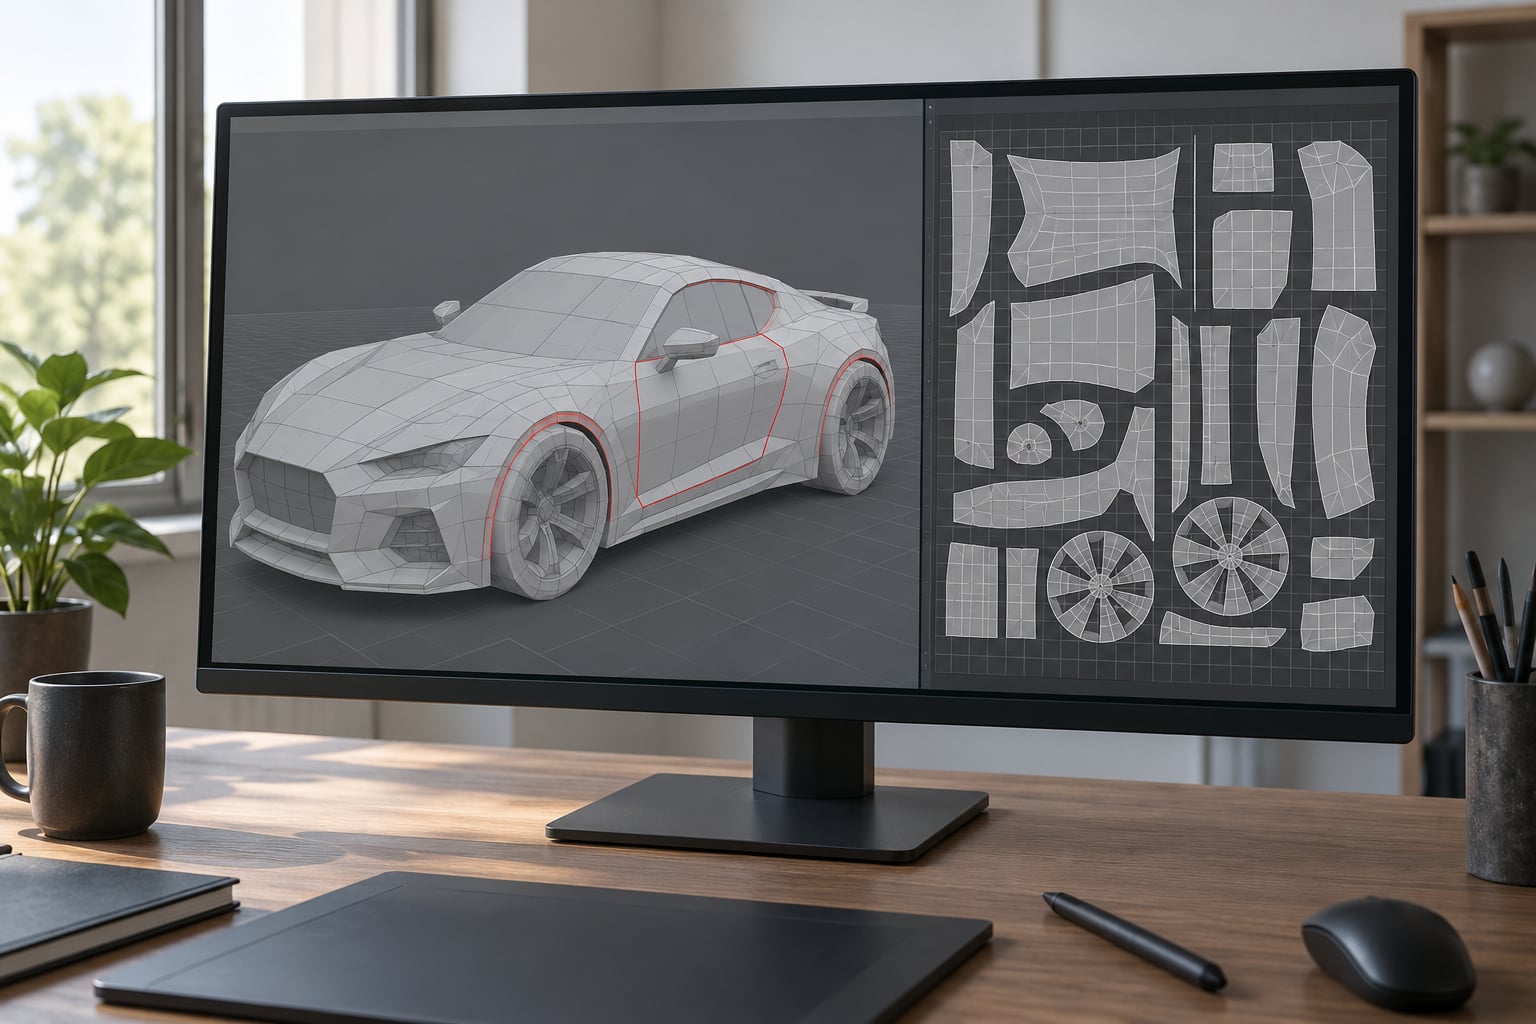
To unwrap UV maps for a car model, you cut the mesh along seams that follow real panel gaps, flatten it into islands, match the texel density across body and trim, and pack everything inside the texture square. In Blender that is about six steps and roughly 45 to 90 minutes for a clean low-poly car.
The reason cars punish sloppy layouts is shape. A car is mostly large smooth compound curves with a few hard creases running through them, so a generic cube-style unwrap either stretches the fenders or cuts seams straight down the middle of a door.
This guide uses Blender 4.x menus. The seam logic transfers to 3ds Max and Maya without changing, and the same six steps apply whether the car ends up in a Rockstar conversion tool, Substance Painter, or a render.
Table of Contents
- 1What You Need
- 2Step-by-Step: How to Unwrap UV Maps for a Car Model
- 31. Prepare the Car Model for UV Unwrapping
- 42. Mark Efficient Seams Around the Car
- 53. Unwrap the Car Mesh in Blender
- 64. Scale and Arrange the UV Islands
- 75. Check Distortion, Overlaps, and Seams
- 86. Export the UV-Mapped Car for GTA Modding
- 9Common Mistakes
- 10Frequently Asked Questions
- 11What is the best UV unwrap method for a car model?
- 12Do I need to unwrap the car body and its parts separately?
- 13How much texture space should each car part use?
- 14Why do my UV islands look stretched after unwrapping?
- 15Should mirrored car parts share the same UV area?
- 16How do I fix overlapping UVs before exporting?
- 17Conclusion
What You Need
Blender 4.x is the only requirement. It installs UV Editing into the workspace editor, and every step below happens there. If you prefer another package, the table below maps the same operations across the three tools most modders use.
| Software | Main unwrap command | Seam marking | Packing |
|---|---|---|---|
| Blender 4.x | U then Unwrap (Angle Based or Conformal) | Edit mode, Ctrl+E Mark Seam | P, Pack Islands, with margin |
| 3ds Max (recent versions) | Unwrap UVW modifier with Peel | Convert Edge Selection to Seam | Pack Custom, target tile size |
| Maya | Unfold UV with edge selection seams | Mark Seam tool on edges | Layout UVs with shells together |
Beyond the software, you need the model itself in a workable state. A downloaded game asset with mirrored duplicates, duplicate vertices and fifteen loose objects will fight you the whole way.
A clean scene means one body shell, transforms applied, normals pointing outward, and the pieces you want a single texture on joined together. Deleting the interior when you only need an exterior shell is faster than unwrapping seats you will never see.
Pick your texture resolution before you unwrap, because it changes how much padding you need. A 2048 by 2048 sheet works for most GTA-style vehicle textures; 4096 by 4096 buys detail for badges, vents and stitching at the cost of memory. A 1024 sheet on a full car leaves nothing but flat single colors.
Finally, decide your export format. Blender writes OBJ and FBX, and both carry UVs, but GTA conversion workflows usually want a separate texture file with a matching name and a clean folder structure, not a model with the textures packed inside.
Step-by-Step: How to Unwrap UV Maps for a Car Model
1. Prepare the Car Model for UV Unwrapping
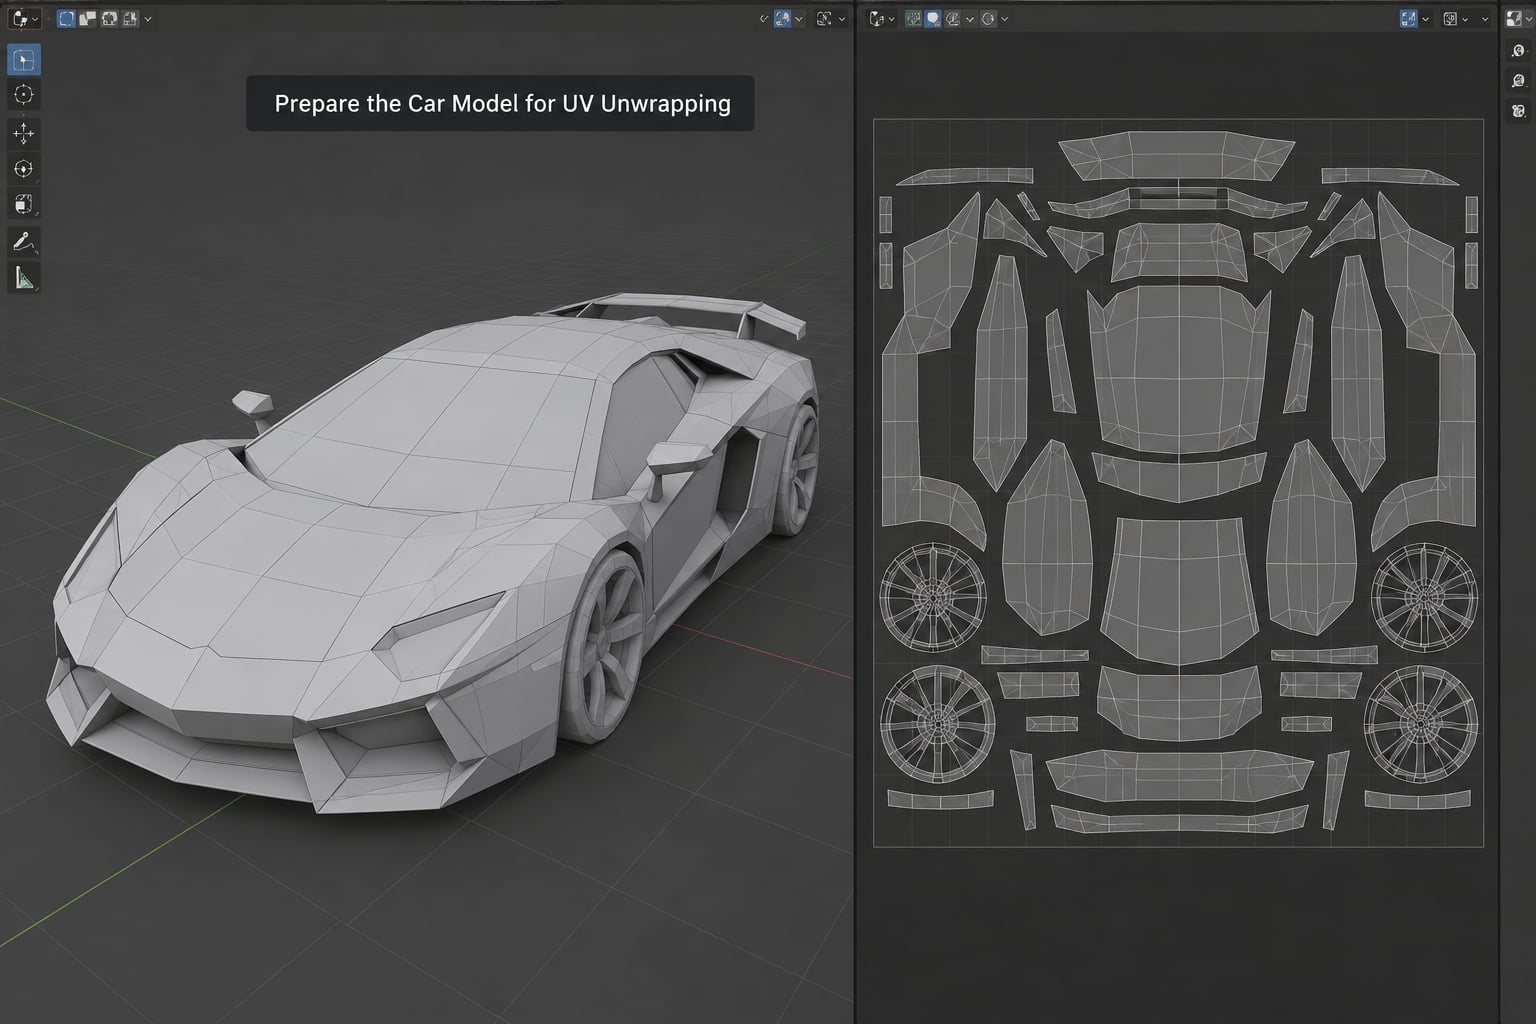
Duplicate your original file before you touch anything. Then select the body shell, press Ctrl+J to join the panels you want on one texture, and run Object, Apply, All Transforms with Ctrl+A in the object mode.
Scale matters more than most beginners expect. A car modeled at 4 meters long and one modeled at 400 units long produce islands at different apparent sizes, and anything you line up later drifts. Pick one real-world scale and hold it.
Fix normals before unwrapping, not after. In edit mode, select all with A and hit Shift+N to recalculate outside. Delete loose geometry with X, Delete, and merge duplicate vertices with Mesh, Clean Up, Merge by Distance.
You know it worked when Blender reports no non-manifold edges on the shell and the shading looks solid with no black patches. Separating your texture groups now also saves time: body paint and glass, wheels and tires, and interior usually belong in separate maps for a game vehicle.
2. Mark Efficient Seams Around the Car
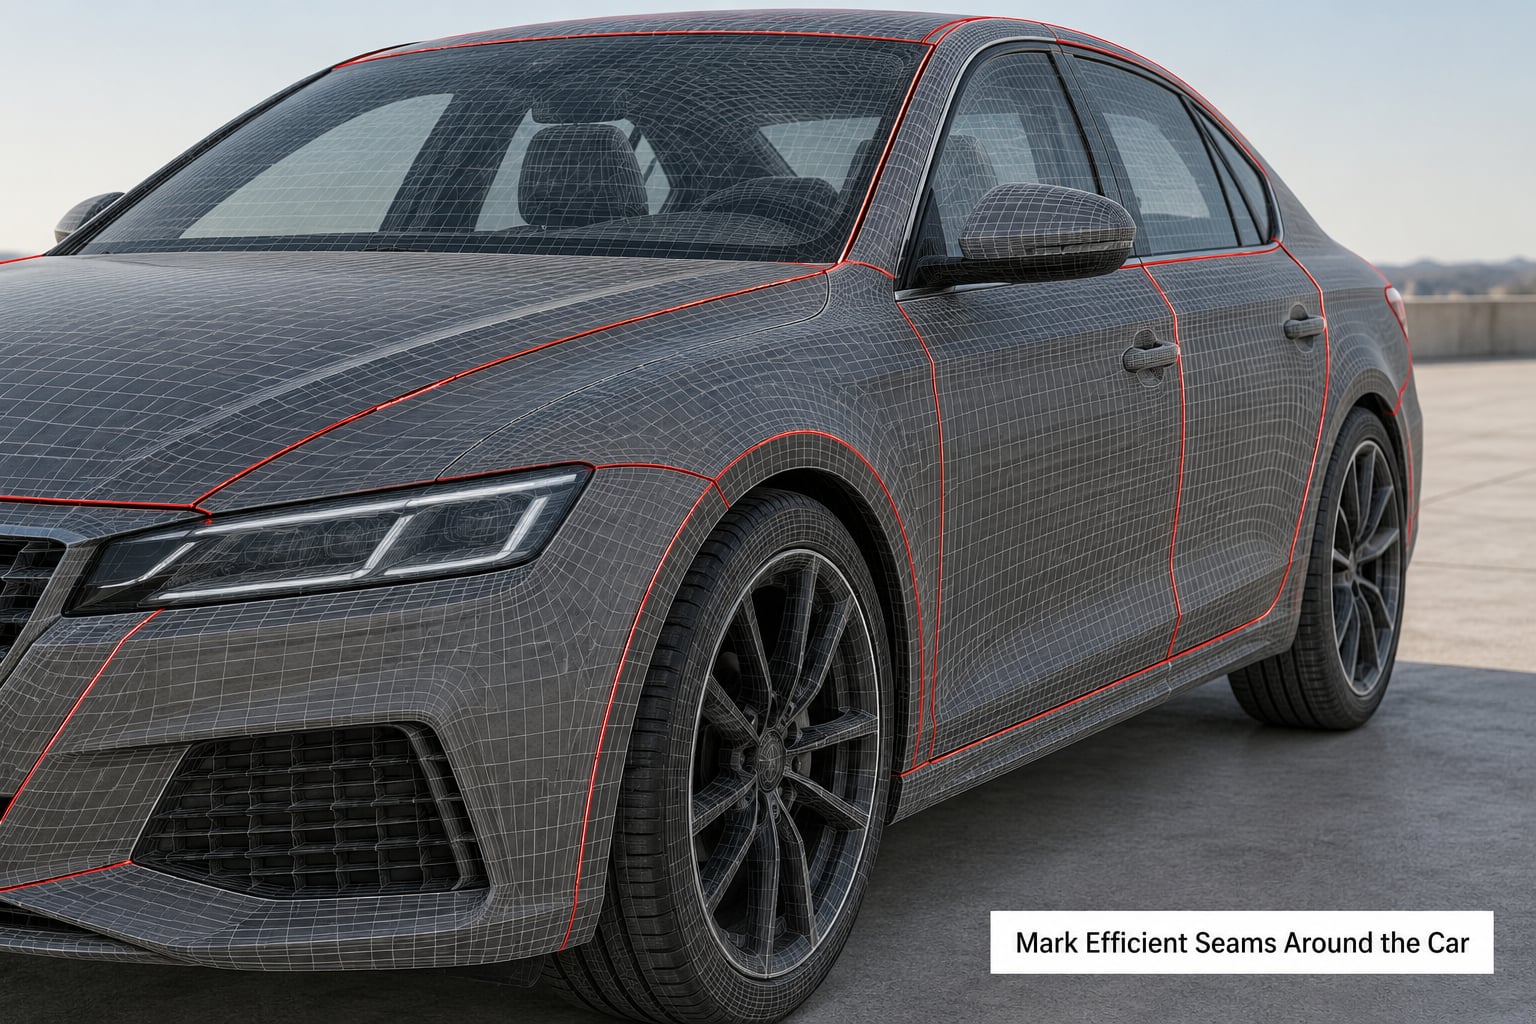
Real cars give you free seams. Panel gaps between the hood and fenders, the door cut lines, the trunk seam, and the wheel arch lips are all edges nobody will ever question because a real car has a shadow line there too.
Select those edges and press Ctrl+E to mark them as seams. A second pass adds a seam under the car along the floor pan edge, and one along the base of the windshield where it meets the cowl.
Avoid cutting across a smooth surface where the eye can track it. On a curved fender, a straight seam reads as a dent; a stepped seam following the topology reads as a panel line. Where you have no choice, follow the quad flow and keep the step sizes even.
The hood and roof are the usual offenders. Run a seam around the perimeter of the hood, down the centre of the roof if you want to mirror the texture, and keep the roof seam straight where it crosses the curve. Extra seams cost you texture space, so mark them where a car would show a real gap.
3. Unwrap the Car Mesh in Blender
Switch to the UV Editing workspace, hover the viewport, and press Tab to enter edit mode. Select every face with A, then press U to open the unwrap menu and choose Angle Based with a 66-degree limit.
Angle Based is the right default for a car because it cuts wherever the surface bends sharply and leaves smooth curves intact. Lower the limit to about 45 degrees if the roof or doors still stretch; raise it toward 89 degrees if you are getting islands the size of postage stamps.
Follow Active Quads is the other one worth learning. Select a single face on a flat panel, run it, and the algorithm unwraps outward from that face in a strip, which produces very tidy layouts for door skins and boot lids.
Smart UV Project is the fallback, not the first choice. It ignores your seams entirely and lays everything out in a grid, which is fine for a prop like a traffic cone and wrong for a car where you need control over where paint lines land.
If the body is one mesh and the trim is another, unwrap them separately first. Trying to force mismatched shells into one unwrap pass is where most beginners lose an afternoon. On the Blender Artists forum, the recurring car UV question is exactly this: how to merge separate parts into a single layout without wrecking the seams you already marked.
4. Scale and Arrange the UV Islands
Select all islands in the UV editor and press S to scale them to fit the square, then press P and choose Average Island Scale. That averages texel density across the model so the roof and the door panels get roughly the same number of texels per square unit of surface.
If a bumper looks noticeably blurry next to the hood after that, select just the bumper islands and scale them up by hand until the checker squares match. Equal square size in the UV editor is the whole test, and you can see it directly.
Pack with a margin. In the Pack Islands panel set the margin to 0.01, which at 2048 resolution leaves about 20 pixels between shells, and enable Correct Aspect so nothing is stretched to fit.
Leave the far right edge of the square empty. Game engines sample with bilinear filtering, so anything touching the border bleeds into the pixel row outside it and shows up as a smeared stripe on the car.
5. Check Distortion, Overlaps, and Seams
Load a UV grid or checker image in the Image Editor while the UV editor is open. Squares that stay square across the hood, doors and roof mean no distortion. Long thin squares mean stretched UVs, and the fix is always the same: unwrap that area again with a tighter angle limit or a manual seam.
Turn on Overlap in the UV editor view menu and watch the islands highlight as you move the cursor over them. Anything that lights up two shells at once is stacked and will flicker between textures in game.
Walk around the car at the distance a player sees it. Look at the transition from door to quarter panel and from hood to windshield, because those are the two places a seam placed a few centimeters off from the panel gap shows up immediately.
For the interior, check separately from the driver’s seat position. Dash and door card interiors are nearly always a second texture with its own layout, and stretching there is invisible until someone sits down in the car.
6. Export the UV-Mapped Car for GTA Modding
Save your file, then export with File, Export, and pick OBJ or FBX. Tick Normals and UVs, untick anything you did not use, and disable Apply Modifiers unless you are certain you want the modifiers baked.
Export the texture as a PNG or TGA at the resolution you planned, named to match the model file exactly. GTA conversion tools look for the texture by name in the same folder, and a mismatch between car.ytd and car.png is the most common reason a converted model loads untextured.
Keep the folder flat and predictable: model file, texture file, and a copy of the blend or max file. Most open-source conversion tools build a resource package from directory structure, so a tidy folder saves an afternoon later.
Before you call it done, reopen the exported file in a fresh Blender scene and check the UVs survived. If the export dropped them, the usual cause is exporting with Use UVs unchecked or exporting a modifier stack that replaced the mesh.
Common Mistakes
Checker squares turn into rectangles on the fenders. The angle limit is too high for that panel. Unwrap just those faces at 45 degrees and average the island scale again.
A seam runs down the middle of a door. Move it to the door cut line where the handle gap is. The eye expects a seam there and nowhere else.
Islands overlap after packing. Overlap view shows them in red. Pack again, or use Average Island Scale to make the shells similar sizes so the packer has an easy job.
Islands run past the edge of the square. The 0 to 1 border is a hard boundary. Pack Islands keeps them inside; manual dragging does not, and anything crossing it clips in game.
The texture is blurry on small parts. Mirrors and badges are tiny next to a 4-meter body. Give them their own sheet, or accept that a single 2048 map cannot hold them and a licence plate at full detail.
Black or white patches appear on the mesh in game. Almost always flipped normals on a few faces, or UV shells with mirrored winding. Recalculate normals outside before export.
The seam shows up as a bright line even without a texture. Duplicate vertices along that edge stopped the seam from joining. Run Merge by Distance on the affected area and unwrap again.
The whole car needed re-unwrapping after one edit. Unwrap as you model, not at the end. That is the single most repeated piece of advice on modeling forums, and it saves more time than any packing trick.
Before you release anything, test it three ways: rotate the model slowly in the viewport watching the checker, view the car from a distance and then from two metres, and load it once in the conversion tool you actually use. The last check catches name and folder problems no amount of viewport work will.
Frequently Asked Questions
What is the best UV unwrap method for a car model?
Angle Based Unwrap at a 66-degree limit is the best starting point for a car body, because it cuts at panel creases and keeps smooth compound curves intact. Drop to 45 degrees where a roof or door still stretches, or use Follow Active Quads on flat panels like a boot lid for a neater strip layout. Smart UV Project is a fallback for props, not for paint lines.
Do I need to unwrap the car body and its parts separately?
Yes, treat each texture group as its own job. Body shell, wheels and tires, glass, and interior usually get separate texture files in a game vehicle, and unwrapping each separately takes less time than forcing mismatched shells into one pass. You can join the parts later in the UV editor and pack them together, as long as each already has clean, distortion-free islands.
How much texture space should each car part use?
Give every island roughly the same texel density rather than the same amount of square space, since the roof and a door skin are different surface areas. Use Average Island Scale in Blender to match them, then verify that checker squares stay square on both. On a 2048 sheet, plan for about 20 pixels of margin between shells and keep the far border clear.
Why do my UV islands look stretched after unwrapping?
Stretched islands mean the unwrap flattened a curved surface too aggressively, usually because the angle limit was too high for that panel. Load a UV grid or checker image in the Image Editor and look for long thin squares instead of square ones. Unwrap those faces again at a lower angle, then re-run Average Island Scale so the fix does not undo the rest of the layout.
Should mirrored car parts share the same UV area?
You can stack mirrored geometry on the same UV area, and it is worth doing for small repeated parts like lug nuts, brake discs, and seat shapes to save room. Do not stack large panels such as doors or fenders, because overlapping shells flicker if the textures ever differ. Keep the mirror matching set inside the border with its own margin so filtering does not bleed.
How do I fix overlapping UVs before exporting?
Turn on Overlap in the UV editor view menu and move the cursor over the model. Shells that highlight together are stacked, and you fix them by selecting each island and pressing P for Pack Islands, or by scaling the offending shell down by hand. Fix overlaps in the UV editor rather than by moving geometry, and re-check after every pack.
Conclusion
Start with the panel gaps, not the unwrap button. Mark the seams on the real door cuts, hood outline and wheel arches, run Angle Based at 66 degrees, average the island scale, and pack with a 0.01 margin.
Then check it with a checker texture before you touch any export settings. Most broken car UVs are a stretch or an overlap, and both are visible in about ten seconds in the UV editor.